People love my balls - my Oreo balls, that is.
I could refer to them as Oreo Truffles, like they do on allrecipes.com, but what's the fun in that?
Years ago, my friend Kathy put a dozen of them in a silent auction at church. My son didn't care that he had never tried them - they were Oreo goodness packed into an orb and dunked in white chocolate. It was a no brainer. No matter the cost, they were coming home with us.
They were quite tasty.
I didn't make them until a couple years later. Jim was a freshman in high school and new to the football team. I thought the guys needed a little reward for completing their last day of double practices. I remembered the "cookie" that didn't require me to turn the oven on during an August heat wave, and whipped up a double batch. It was on that fateful day, that I became Oreo ball famous.
I got hugs from gross, sweaty, stinky, teenage running backs and lineman. Countless mothers asked me for the recipe. Teachers requested them. After Hannah hit high school two years later, I had to make them for Speech competitions and Dance Team bake sales. Any day the kids deemed special, was a day to take Oreo balls to school.
I took them to work. Every time we had an event that called for bringing food, it was assumed I would bring balls. One of my former bosses calls them as "little teardrops from heaven".
People have told me funny stories about their attempt to make Oreo balls. Someone once used butter instead of cream cheese. Eww. The best was from woman I worked with, who tried to make the "dough" using only her hands. I'm sure she was trying to get Oreo goo out from under her fingernails for weeks.
So that I cannot be accused to hoarding any Oreo ball secrets, here is my step-by-step tutorial.
--One package of Oreos - no substitutions. No store-brand knock-offs allowed. No "double-stuff" or green-in-the-middle Oreos for St. Patrick's Day either - just ordinary Oreos.
--One package of cream cheese - whatever brand you like, but I've never used the low fat stuff. I mean please! If you are hellbent on lowering the calorie count from 523 to 518 per ball, you shouldn't be making these to begin with. (I'm kidding about the calorie count. I hope.)
--One package of white chocolate or white candy coating or white almond bark. I use the almond bark or candy coating because I don't have the patience to melt real white chocolate. And I burn it. Like, every time I attempt it.
3 ingredients total. Got that? But the key to a good Oreo ball is the machinery. You either need a kick-ass food processor or a mixer with major muscle, like this one.
Here we go.
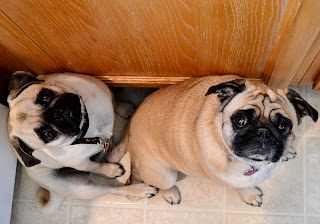
Put the package of Oreos into your machine. You can crush them before hand, but I never do. I'm all about letting the machine do the work. With the Oreos in the mixer, I start out with the bowl lowered, so cookie parts and pieces don't fly out, land on the floor and make my dogs sick (they are constantly perched in what they presume to be the optimum position to nab anything resembling food falling to the floor).
After they are crunched up a bit, then the bowl can be raised while still mixing on a low speed.
Then add the brick of cream cheese. Again, start out with the bowl lowered, on low speed.
Then raise the bowl, until it is mixed enough not to spew crumbs. (The mixer came with a shield to prevent such things as crumb spewing. That disappeared 3 minutes after I opened the box.)
Then speed it up. I mean really let her rip. Leave it on a high speed for a minute or two, then scrape the sides with a spatula if needed. I usually put the mixer back on high for another minute or two or three. Whenever you think it has a good consistency, stop mixing. Good consistency means when it looks like tar, has a glossy sheen and feels like bread dough with sand in it. Sounds yummy, right?
At this point, you can cover the mixture and put it in the fridge for a couple hours or a couple days - or - you can roll them into balls and then refrigerate them. Doesn't matter. But at some point, they do have to be formed into balls, and they have to be cold when you dunk them in the white stuff.
Dunk a ball, fish it out with a fork, tap it on the side of the tray or pan a few times and scrape it off the fork with a knife onto parchment or wax paper. You'll start out with nice, clean white balls. (I've often thought of trying to paint them with food coloring to look like eye balls for Halloween. Thinking about it is as far as I've gotten.) Toward the end of the dunking process, they have some Oreo ball parts and pieces in the white stuff, so they are not smooth and white. But that's OK. Nobody cares.
Let them sit until the chocolate/almond bark/candy coating is firm, then they can be transferred to a plate.
Be sure to keep them refrigerated. And brace yourself for a shower of lovin' that will inevitably come your way.


From one woman to another, nice balls!
ReplyDeleteYou have awesome she balls and I love them.
ReplyDelete